The public health features in Pract-Eze Dental are only visible if you unhide them in the Easy Options. There are two separate yet related components to the public health features.
Patient Fields
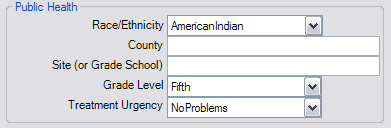
First of all, there are the additional fields available in the Patient Edit window:
The fields should be fairly self explanatory. When entering information in the county and site, the user is restricted to a preset list to prevent spelling mistakes and make reporting easier. To setup these two lists, go to the Main Menu | Lists | Counties or Sites. They are setup very similarly.
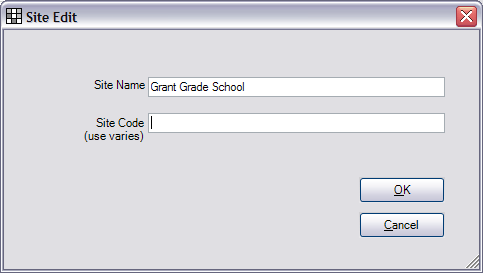
The code in each case is entirely optional. It is a useful place to put additional information about the site or county. If you later change a site or county name, it changes it for all patients using it. If you have mobile vans providing service to children, it is recommended to use the site field for the name of the school or community center. The Clinic field can be used to track which van provided the service. The site field can also be used to track nursing homes, etc.
Screening Features
Separate from the additional patient fields, there is also a screening tool. Go to Main Menu | Tools | Public Health Screening.
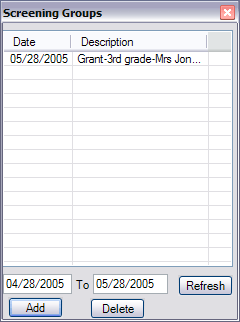
The screen layout may look odd, but that's because it's been designed to eventually fit on a PDA or Palm computer. A screening group is typically a classroom full of children, although it can be as large as an entire school. The screener and the location must be the same for the entire group. If you revisit the same school later, it is considered a separate group because it has a different date. Add a group and add items to the group as shown below.
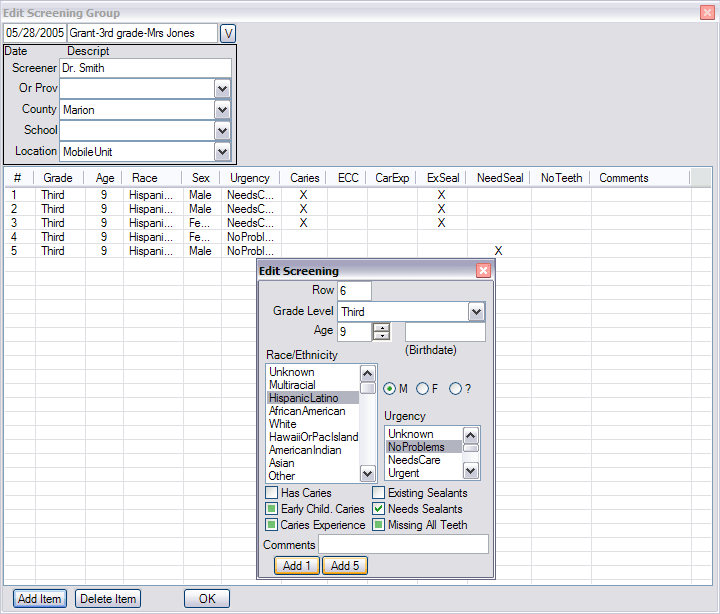
All entry was designed with speed and simplicity in mind. Everything is done with very few clicks and no typing. As you add each child to the list, you only need to make a few changes before entering the next one. All other fields remain the same from child to child. The 6 checkboxes at the bottom have three states: checked, unchecked, and indeterminate (unknown). All fields have unknown as one of the choices so that you only need to enter the fields that are needed by your organization. You don't track the patient names at this point, although you can put the name in the Comments field if you wish. If the patient needs treatment, you may consider entering them into the system as a regular patient and putting their patient ID number in the Comments section. There is still no built-in method for automatically matching a screening patient with a regular patient.
Reports
In the Main Menu, select Reports | Raw Screening Data. This gives you all screening data as a single table for the date range you choose. Because it is a single table with each patient on one row, you can do extensive statistical analysis. All fields that are required by the standard Basic Screening Survey are present, so this data is compliant if you are required to use that format.
The other report is the Raw Population Data, which reports much of the same information, but from the regular patients rather than from the screening tool. Each patient is shown on one row, again simplifying further analysis of the data.
The data from both reports is intended to be saved to text files and sent to a centralized office where it gets loaded into one larger table containing data from many locations. For instance, all data for an entire state could be sent to a central office once per month. The data format makes it easy to automate grouping and reporting on this data. This is data which is badly needed but which is usually collected by very inefficient labor intensive methods.