
click image to enlarge |
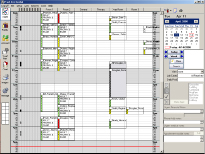
Appointments
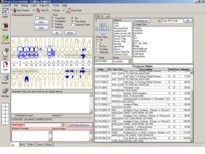
Pract-Eze Dental has support for unlimited Operatories and unlimited providers. Although you can only view about 6 or 7 operatories at one time due to space limitations, you can set up different Views. Each view can have any combination of operatories and providers, and will not display the others. So you can have one view for your hygiene rooms, one view for each doctor, or any number of other creative combinations. To switch between the different views, you would normally use one of the twelve function keys at the top of your keyboard. You can also select a view from the drop down list on the right hand side below the calendar and pinboard. You can see that an entire ten hour day fits on the screen. back |
|
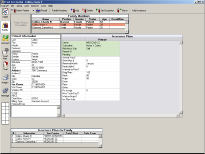
Family
This is where the basic patient and insurance information is entered and organized. You can see all the useful information including percentages on one screen. In the toolbar at the top, you can Select a Patient, access the patient Recall, make changes to the Family Members List, or add an Insurance Plan. The patient information section is located to the left. To edit the Patient Information, double click on that area. back |
click image to enlarge |
click image to enlarge |
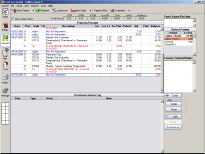
Account
The Account module is where the patient's finances are organized. Accounts are tracked on a patient basis, not a family basis. Notice, on the screen shot below, that the family list is on the right side of the screen with each patient balance. You can switch between family members very quickly by single-clicking on a name in the family list. In the main table, you can see that all procedures are automatically grouped by date with their Insurance Claim and related Payments and Adjustments for easy reference. back |
|
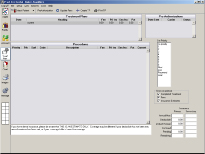
Treatment
The treatment plan is a prioritized list of treatment that the patient needs. After entering needed treatment from the Chart module, you can move to this module to organize it for the patient. In the Treatment Plans list at the top, you can see that there is a 'current' TP in addition to any saved TP's. The current TP will change. For instance, as procedures gets completed, they will no longer show on the current TP. So anytime you give a TP to a patient, it is strongly recommend to use the Create TP button in the toolbar to save a copy. This creates a permanent archive that you can refer back to when talking with a patient. The other purpose for allowing muliple TP's is if you want to give the patient alternate TP's. Add all procedures to the current TP. Then, highlight some of them, and click Create TP. Do the same for any alternate TP's. Any TP can be printed and presented to the patient showing all information about the proposed TP in a very graphical format. Estimated Insurance Coverage information can also be added to the printout. back |
click image to enlarge |
click image to enlarge |
Chart
The Progress Notes are on the right, showing a list of all procedures treatment planned and completed. The treatment notes for each procedure are stored with the procedure and are visible here. At the top of the screen in the Show box, you can select which types of procedures are displayed and whether the procedure notes are displayed or hidden. If you check the Selected Teeth box, then you should select some teeth in the graphical tooth chart, and only procedures which have those tooth numbers will show. But remember that previous extractions will always show even if the tooth number is different. This allows you to always see the missing teeth in the graphical chart. Each procedure can be edited by double clicking on it, and there is more information in that section about the meanings of each of the statuses. As you can see, the items in the progress notes are color coded by status. The colors are completely user defined in the Definitions. Rx's are shown as line items in the progress notes along with their note, and their color is customizable as well. back |
|
Image
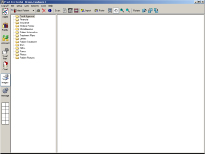
Most forms and letters that you would normally store in the patient's chart can instead be scanned in and stored here. If you still use paper charts, they can be much thinner and cleaner. Images are saved as simple jpg making them always available to other programs. See the Imaging section for information on how Pract-Eze Dental works with other hardware and software vendors. back |
click image to enlarge |
click image to enlarge |
Manage
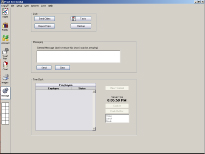
In the Manage module, click the Send Claims button at the top: You create a claim from the Account module for that patient. You can print directly from within the Claim Edit window, or you can use the Send Claims window shown above for batch processing. Once the claim is created and the status has been changed to 'Waiting to Send' it will show on this list. The setting in the Insurance Plan determines whether it will show as an e-claim or a paper claim. To print all paper claims, click Print. If you have selected some claims first, only those claims will print. You can also select e-claims as well as paper claims before clicking the print button if you wish to manually print e-claims. The Blank button prints a blank claim form. To send e-claims, use the Send E-claims button. See the E-Claims section for information on how to set up and use e-claims. If you are using e-claims (X-12 only), you may see missing info in the last column. You will have to go to other places in the program to fix the missing info, then return here to continue. back |